30 KiB
Advanced usage
404 handler
Registering the "not found" handler is a different way than ESP8266WebServer (WebServer as ESP32). The onNotFound of ESP8266WebServer/WebServer does not work with AutoConnect. AutoConnect overrides ESP8266WebServer::onNotFound/WebServer::onNotFound to handle a captive portal. To register "not found" handler, use AutoConnect::onNotFound.
Access to saved credentials
AutoConnect stores the established WiFi connection in the flash of the ESP8266/ESP32 module and equips the class to access it from the sketch. You can read, write or erase the credentials using this class individually. It's AutoConnectCredential class which provides the access method to the saved credentials in the flash. Refer to section Saved credentials access for details.
!!! note "Where to store credentials in ESP32 with AutoConnect v1.0.0 or later"
Since v1.0.0, credentials are stored in nvs of ESP32. AutoConnect v1.0.0 or later accesses the credentials area using the Preferences class with the arduino esp-32 core. So in ESP32, the credentials are not in the EEPROM, it is in the namespace AC_CREDT of the nvs. See Saved credentials access for details.
In ESP8266, it is saved in EEPROM as is conventionally done.
Automatic reconnect
When the captive portal is started, SoftAP starts and the STA is disconnected. The current SSID setting memorized in ESP8266 will be lost but then the reconnect behavior of ESP32 is somewhat different from this.
The WiFiSTAClass::disconnect function implemented in the arduino-esp32 has extended parameters than the ESP8266's arduino-core. The second parameter of WiFi.disconnect on the arduino-esp32 core that does not exist in the ESP8266WiFiSTAClass has the effect of deleting the currently connected WiFi configuration and its default value is "false". On the ESP32 platform, even if WiFi.disconnect is executed, WiFi.begin() without the parameters in the next turn will try to connect to that AP. That is, automatic reconnection is implemented in arduino-esp32 already. Although this behavior appears seemingly competent, it is rather a disadvantage in scenes where you want to change the access point each time. When explicitly disconnecting WiFi from the Disconnect menu, AutoConnect will erase the AP connection settings saved by arduino-esp32 core. AutoConnect's automatic reconnection is a mechanism independent from the automatic reconnection of the arduino-esp32 core.
If the autoReconnect option of the AutoConnectConfig class is enabled, it automatically attempts to reconnect to the disconnected past access point. When the autoReconnect option is specified, AutoConnect will not start SoftAP immediately if the first WiFi.begin fails. It will scan WiFi signal and the same connection information as the detected BSSID is stored in the flash as AutoConnect's credentials, explicitly apply it with WiFi.begin and rerun.
AutoConnect       Portal;
AutoConnectConfig Config;
Config.autoReconnect = true;
Portal.config(Config);
Portal.begin();
An autoReconnect option is available to AutoConnect::begin without SSID and pass Passphrase.
!!! caution "An autoReconnect will work if SSID detection succeeded" An autoReconnect will not effect if the SSID which stored credential to be connected is a hidden access point.
Auto save Credential
By default, AutoConnect saves the credentials of the established connection to the flash. You can disable it with the autoSave parameter specified by AutoConnectConfig.
See the Saved credentials access chapter for details on accessing stored credentials.
AutoConnect       Portal;
AutoConnectConfig Config;
Config.autoSave = AC_SAVECREDENTIAL_NEVER;
Portal.config(Config);
Portal.begin();
!!! note "Credentials storage location" The location where AutoConnect saves credentials depends on the module type and the AutoConnect library version, also arduino-esp32 core version.
| AutoConnect | Arduino core for ESP8266 |
Arduino core for ESP32 | |
|---|---|---|---|
| 1.0.2 earlier | 1.0.3 later | ||
| v0.9.12 earlier | EEPROM | EEPROM (partition) | Not supported |
| v1.0.0 later | Preferences (nvs) (Can be used EEPROM with turning off AUTOCONNECT_USE_PREFERENCES macro) |
Preferences (nvs) | |
Captive portal start detection
The captive portal will only be activated if the first WiFi::begin fails. Sketch can detect with the AutoConnect::onDetect function that the captive portal has started. For example, the sketch can be written like as follows that turns on the LED at the start captive portal.
AutoConnect Portal;

bool startCP(IPAddress ip) {
  digitalWrite(BUILTIN_LED, HIGH);
  Serial.println("C.P. started, IP:" + WiFi.localIP().toString());
  return true;
}

void setup() {
  Serial.begin(115200);
  pinMode(BUILTIN_LED, OUTPUT);
  digitalWrite(BUILTIN_LED, LOW);
  Portal.onDetect(startCP);
  if (Portal.begin()) {
    digitalWrite(BUILTIN_LED, LOW);
  }
}

void loop() {
  Portal.handleClient();
}
Captive portal timeout control
AutoConnect has two parameters for timeout control. One is a timeout value used when trying to connect to the specified AP. It behaves the same as general timeout control in connection attempt by WiFi.begin. This control is specified by the third parameter of AutoConnect::begin. The default value is macro defined by AUTOCONNECT_TIMEOUT in the AutoConnectDef.h file.
The other timeout control is for the captive portal itself. It is useful when you want to continue sketch execution with offline even if the WiFi connection is not possible. You can also combine it with the immediateStart option to create sketches with high mobility.
The timeout of the captive portal is specified together with AutoConnectConfig::portalTimeout as follows.
#include <ESP8266WiFi.h>
#include <ESP8266WebServer.h>
#include <AutoConnect.h>

AutoConnect  portal;
AutoConnectConfig  config;

void setup() {
  config.portalTimeout = 60000;  // It will time out in 60 seconds
  portal.config(config);
  portal.begin();
}

void loop() {
  if (WiFi.status() == WL_CONNECTED) {
    // Some sketch code for the connected scene is here.
  }
  else {
    // Some sketch code for not connected scene is here.
  }
  portal.handleClient();
}
Also, if you want to stop AutoConnect completely when the captive portal is timed out, you need to call the AutoConnect::end function. It looks like the following code:
bool acEnable;

void setup() {
  config.portalTimeout = 60000;  // It will time out in 60 seconds
  portal.config(config);
  acEnable = portal.begin();
  if (!acEnable) {
    portal.end();
  }
}

void loop() {
  if (WiFi.status() == WL_CONNECTED) {
    // Some sketch code for the connected scene is here.
  }
  else {
    // Some sketch code for not connected scene is here.
  }
  if (acEnable) {
    portal.handleClient();
  }
}
There is another option related to timeout in AutoConnectConfig. It can make use of the captive portal function even after a timeout. The AutoConnectConfig::retainPortal option will not stop the SoftAP when the captive portal is timed out. If you enable the ratainPortal option, you can try to connect to the AP at any time while continuing to sketch execution with offline even after the captive portal timed-out. Compared to the above code specified no option with the following example code, the captive portal will remain available even after a timeout without changing the logic of the sketch.
#include <ESP8266WiFi.h>
#include <ESP8266WebServer.h>
#include <AutoConnect.h>

AutoConnect  portal;
AutoConnectConfig  config;

void setup() {
  config.portalTimeout = 60000;  // It will time out in 60 seconds
  config.retainPortal = true;
  portal.config(config);
  portal.begin();
}

void loop() {
  if (WiFi.status() == WL_CONNECTED) {
    // Some sketch code for the connected scene is here.
  }
  else {
    // Some sketch code for not connected scene is here.
  }
  portal.handleClient();
}
Casts the HTML pages to be add-on into the menu
If your sketch handles web pages, you can embed the pages into the AutoConnect menu in continuance enjoying the utility of the WiFi connection feature. Unlike the custom Web pages by AutoConnectElements, this allows to legacy web pages registered by ESP8266WebServer::on or WebServer::on function.
To implement embedding your legacy web pages to the AutoConnect menu, you can use AutoConnectAux only constructed with the URI of the page to be embedding. AutoConnectElements is not required. The basic procedure for this as follows:
- Declare AutoConnectAux for each legacy page. It includes the URI of the page and item string which will display in the AutoConnect menu.
- Sketch the legacy page handlers.
- Register those handler functions to ESP8266WebServer/WebServer with the on function.
- Register AutoConnectAux declared with #1 to AutoConnect using AutoConnect::join function. It serves as a menu item.
- Begin the portal.
- Performs AutoConnect::handleClient in the loop function.
For details, see section Constructing the menu of Examples page.
Change menu title
Although the default menu title is AutoConnect, you can change the title by setting AutoConnectConfig::title. To set the menu title properly, you must set before calling AutoConnect::begin.
AutoConnect       Portal;
AutoConnectConfig Config;

void setup() {
  // Set menu title
  Config.title = "FSBrowser";
  Portal.config(Config);
  Portal.begin();
}
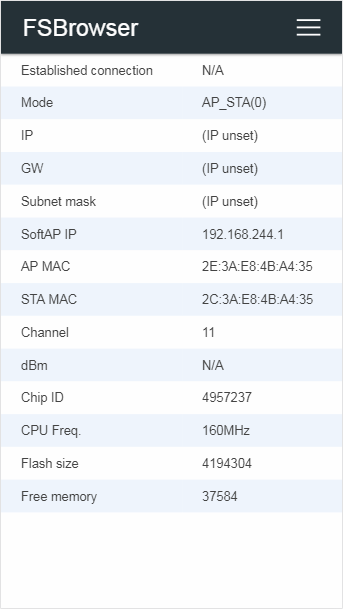
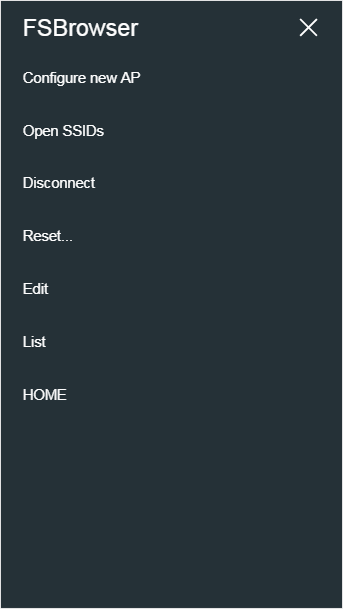
Executing the above sketch will rewrite the menu title for the FSBrowser as the below.
Change the menu labels
You can change the label of the AutoConnect menu item by rewriting the default label letter in AutoConnectLabels.h macros. However, changing menu items letter influences all build scenes for the Sketch.
#define AUTOCONNECT_MENULABEL_CONFIGNEW   "Configure new AP"
#define AUTOCONNECT_MENULABEL_OPENSSIDS   "Open SSIDs"
#define AUTOCONNECT_MENULABEL_DISCONNECT  "Disconnect"
#define AUTOCONNECT_MENULABEL_RESET       "Reset..."
#define AUTOCONNECT_MENULABEL_HOME        "HOME"
#define AUTOCONNECT_BUTTONLABEL_RESET     "RESET"
See also: Change label text
Combination with mDNS
With mDNS library, you can access to ESP8266 by name instead of IP address after connection. The sketch can start the MDNS responder after AutoConnect::begin.
#include <ESP8266WiFi.h>
#include <ESP8266mDNS.h>
#include <ESP8266WebServer.h>
AutoConnect Portal;

void setup() {
  if (Portal.begin()) {
    if (MDNS.begin("esp8266")) {
      MDNS.addService("http", "tcp", 80);
    }
  }
}

void loop() {
  Portal.handleClient();
}
Debug print
You can output AutoConnect monitor messages to the Serial. A monitor message activation switch is in an include header file AutoConnectDefs.h of library source. Define AC_DEBUG macro to output the monitor messages.1
#define AC_DEBUG
Disable the captive portal
It can also prevent the captive portal from starting even if the connection at the first WiFi.begin fails. In this case, AutoConnect::begin behaves same as WiFi.begin.
For disabling the captive portal, autoRise sets to false with AutoConnectConfig.
AutoConnect       portal;
AutoConnectConfig acConfig;

acConfig.autoRise = false;
portal.config(acConfig);
portal.begin();
Make SSID of SoftAP unique
You can change SoftAP's SSID and password programmatically when the captive portal starts up. By using chip specific ID of esp8266/esp32 you can make SSID of SoftAP unique. SSID and password for SoftAP is AutoConnectConfig::apid and AutoConnectConfig::psk.
AutoConnect       portal;
AutoConnectConfig acConfig;

acConfig.apid = "ESP-" + String(ESP.getChipId(), HEX);
acConfig.psk = YOUR_PASSWORD;
portal.config(acConfig);
portal.begin();
!!! hint "Obtaining chip ID for ESP32"
acConfig.apid = "ESP-" + String((uint32_t)(ESP.getEfuseMac() >> 32), HEX);
Move the saving area of EEPROM for the credentials
By default, the credentials saving area is occupied from the beginning of EEPROM area. ESP8266 Arduino core document says that:
The following diagram illustrates flash layout used in Arduino environment:
|--------------|-------|---------------|--|--|--|--|--|
^              ^       ^               ^     ^
Sketch    OTA update   File system   EEPROM  WiFi config (SDK)
and
EEPROM library uses one sector of flash located just after the SPIFFS.
Also, in ESP32 arduino core 1.0.2 earlier, the placement of the EEPROM area of ESP32 is described in the partition table. So in the default state, the credential storage area used by AutoConnect conflicts with data owned by the user sketch. It will be destroyed together saved data in EEPROM by user sketch and AutoConnect each other. But you can move the storage area to avoid this.
The boundaryOffset in AutoConnectConfig specifies the start offset of the credentials storage area. The default value is 0.
!!! info "The boundaryOffset ignored with AutoConnect v1.0.0 later on ESP32 arduino core 1.0.3 later" For ESP32 arduino core 1.0.3 and later, AutoConnect will store credentials to Preferences in the nvs. Since it is defined as the namespace dedicated to AutoConnect and separated from the area used for user sketches. Therefore, the boundaryOffset is ignored with the combination of AutoConnect v1.0.0 or later and the arduino-esp32 1.0.3 or later.
On-demand start the captive portal
If you do not usually connect to WiFi and need to establish a WiFi connection if necessary, you can combine the autoRise option with the immediateStart option to achieve on-demand connection. This behavior is similar to the WiFiManager's startConfigPortal function. In order to do this, you usually configure only with AutoConnectConfig in setup() and AutoConnect::begin handles in loop().
AutoConnect       Portal;
AutoConnectConfig Config;

void setup() {
  Config.autoRise = false;
  Config.immediateStart = true;
  Portal.config(Config);
}

void loop() {
  if (digitalRead(TRIGGER_PIN) == LOW) {
    while (digitalRead(TRIGGER_PIN) == LOW)
      yield();
    Portal.begin();
  }
  Portal.handleClient();
}
The above example does not connect to WiFi until TRIGGER_PIN goes LOW. When TRIGGER_PIN goes LOW, the captive portal starts and you can connect to WiFi. Even if you reset the module, it will not automatically reconnect.
Refers the hosted ESP8266WebServer/WebServer
Constructing an AutoConnect object variable without parameters then creates and starts an ESP8266WebServer/WebServer inside the AutoConnect. This object variable could be referred by AutoConnect::host function to access ESP8266WebServer/WebServer instance as like below.
AutoConnect Portal;

Portal.begin();
ESP8266WebServer& server = Portal.host();
server.send(200, "text/plain", "Hello, world");
!!! info "When host() is valid" The host() can be referred at after AutoConnect::begin.
Usage for automatically instantiated ESP8266WebServer/WebServer
The sketch can handle URL requests using ESP8266WebServer or WebServer that AutoConnect started internally. ESP8266WebServer/WebServer instantiated dynamically by AutoConnect can be referred to by AutoConnect::host function. The sketch can use the 'on' function, 'send' function, 'client' function and others by ESP8266WebServer/WebServer reference of its return value.
#include <ESP8266WiFi.h>
#include <ESP8266WebServer.h>
#include <AutoConnect.h>

AutoConnect       Portal;

void handleRoot() {
  ESP8266WebServer& IntServer = Portal.host();
  IntServer.send(200, "text/html", "Hello, world");
}

void handleNotFound() {
  ESP8266WebServer& IntServer = Portal.host();
  IntServer.send(404, "text/html", "Unknown.");
}

void setup() {
  bool r = Portal.begin();
  if (r) {
    ESP8266WebServer& IntServer = Portal.host();
    IntServer.on("/", handleRoot);
    Portal.onNotFound(handleNotFound);    // For only onNotFound.
  }
}

void loop() {
  Portal.host().handleClient();
  Portal.handleRequest();
  /* or following one line code is equ.
  Portal.handleClient();
  */
}
!!! note "ESP8266WebServer/WebServer function should be called after AutoConnect::begin" The sketch cannot refer to an instance of ESP8266WebServer/WebServer until AutoConnect::begin completes successfully.
!!! warning "Do not use with ESP8266WebServer::begin or WebServer::begin" ESP8266WebServer/WebServer is already running inside the AutoConnect.
Use with the PageBuilder library
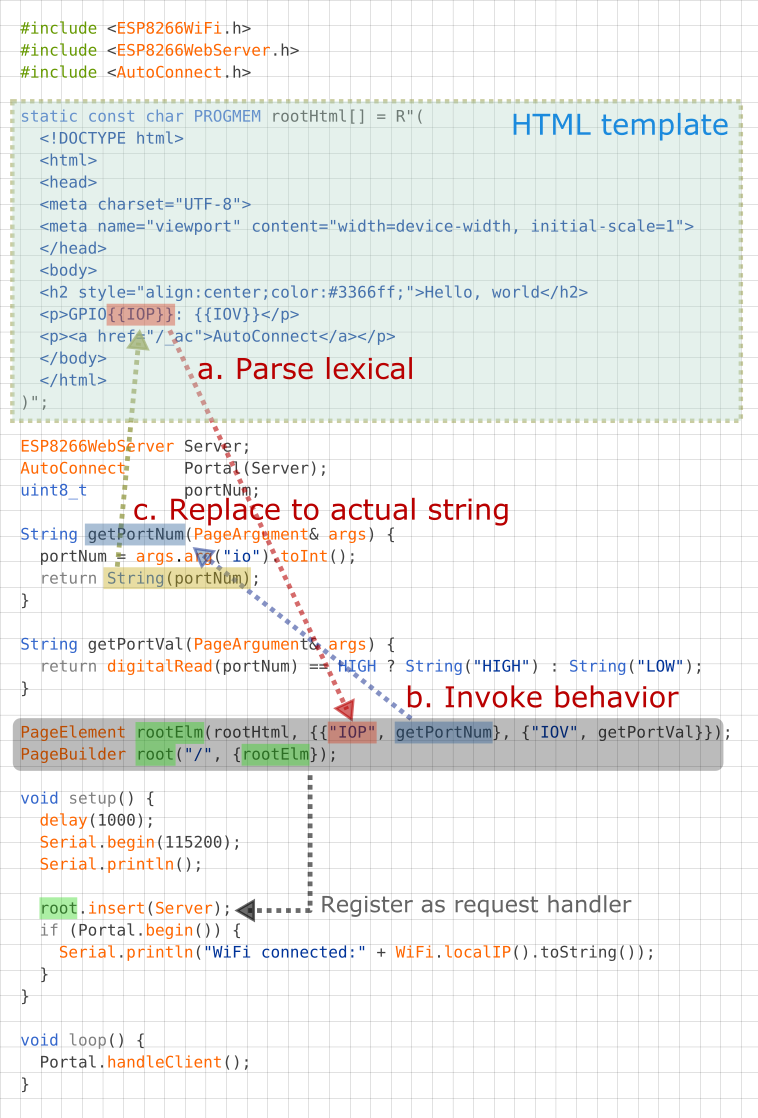
In ordinary, the URL handler will respond the request by sending some HTML. PageBuilder library is HTML assembly aid. it can handle predefined HTML as like a template and simplify an HTML string assemble logic, and also the generated HTML send automatically.
An example sketch used with the PageBuilder as follows and it explains how it aids for the HTML generating. Details for Github repository.
Configuration functions
Configuration for Soft AP and captive portal
AutoConnect will activate SoftAP at failed the first WiFi.begin. It SoftAP settings are stored in AutoConnectConfig as the following parameters. The sketch could be configured SoftAP using these parameters, refer the AutoConnectConfig API for details.
- IP address of SoftAP activated.
- Gateway IP address.
- Subnet mask.
- SSID for SoftAP.
- Password for SoftAP.
- Channel.
- SoftAP name.
- Hidden attribute.
- Station hostname.
- Auto save credential.
- Offset address of the credentials storage area in EEPROM.
- Captive portal time out limit.
- Maintain portal function even after a timeout.
- Length of start up time after reset.
- Automatic starting the captive portal.
- Start the captive portal forcefully.
- Auto reset after connection establishment.
- Home URL of the user sketch application.
- Menu title.
- Ticker signal output.
- Built-in OTA update.
!!! note "AutoConnect::config before AutoConnect::begin" AutoConnect::config must be executed before AutoConnect::begin.
Assign user sketch's home path
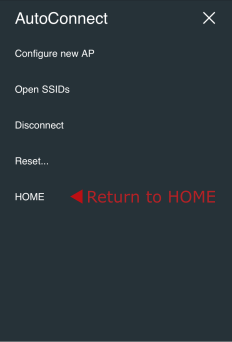
HOME for returning to the user's sketch homepage will display at the bottom of the AutoConnect menu. It could be set using the AutoConnect::home function.
The sketch HOME path is closely related to the bootUri that specifies the access path on module restart. AutoConnect has the following three parameters concerning control the URIs:
- AUTOCONNECT_URI
The ROOT of AutoConnect. It is defined inAutoConnectDefs.hand is assigned an AutoConnect statistics screen by default. - AutoConnectConfig::homeUri
It is the hyperlink of listed on the AutoConnect menu list as HOME. - AutoConnectConfig::bootUri
Which page appears at the captive portal, AUTOCONNECT_URI or the homeUri. Its page will pop up automatically when you visit the captive portal.
| The definition of HOME | Behavior | Specified by | Default value | Possible value |
|---|---|---|---|---|
| ROOT of AutoConnect | Default for AC_ONBOOTURI_ROOT | #define AUTOCONNECT_URI in AutoConnectDefs.h |
/_ac |
URI string |
| HOME for Application-specific | Listed on the menu list as HOME Also, It may be linked from the menu title and is redundant with the HOME menu item. eg. Case of bootURI = AC_ONBOOTURI_HOME |
AutoConnectConfig::homeURI | / |
URI string |
| Which page loads at the boot time, ROOT or HOME | Appears after module reboot by RESET button with AutoConnect menu | AutoConnectConfig::bootURI | AC_ONBOOTURI_ROOT | AC_ONBOOTURI_HOME |
| Which page appears at the captive portal, ROOT or HOME | Auto pop-up | AutoConnectConfig::bootURI | AC_ONBOOTURI_ROOT | AC_ONBOOTURI_HOME |
Change SSID and Password for SoftAP
An esp8266ap is default SSID name for SoftAP of captive portal and password is 12345678 for ESP8266. Similarly, esp32ap and 12345678 for ESP32. You can change both by setting apid and psk.
AutoConnect portal;
AutoConnectConfig config;

void setup() {
  config.apid = "ap_portal";
  config.psk  = "new_password";
  portal.config(config);
  portal.begin();
}
Also, you can specify the SSID, password for SoftAP with the constructor of the AutoConnectConfig as below.
AutoConnect portal;
AutoConnectConfig config("ap_portal", "new_passwrod");

void setup() {
  portal.config(config);
  portal.begin();
}
You can also assign no password to SoftAP launched as a captive portal. Assigning a null string as String("") to AutoConnectConfig::psk does not require a password when connecting to SoftAP.
But this method is not recommended. The broadcast radio of SSID emitted from SoftAP will leak and reach several tens of meters.
Relocate the AutoConnect home path
A home path of AutoConnect is /_ac by default. You can access from the browser with http://IPADDRESS/_ac. You can change the home path by revising AUTOCONNECT_URI macro in the include header file as AutoConnectDef.h.
#define AUTOCONNECT_URI "/_ac"
Static IP assignment 2
It is also possible to assign static IP Address to ESP8266/ESP32 in STA mode. By default DHCP is enabled and it becomes the IP address assigned by the DHCP server with WiFi.begin.
To assign a static IP to ESP8266/ESP32 with WIFI_MODE_STA, the following parameters are required:
- IP address.
- Gateway address.
- Subnet mask.
- Primary DNS server.
- Secondary DNS server. (optional)
The above parameters must be executed before AutoConnect::begin as arguments of AutoConnectConfig.
AutoConnect        portal;
AutoConnectConfig  Config;
Config.staip = IPAddress(192,168,1,10);
Config.staGateway = IPAddress(192,168,1,1);
Config.staNetmask = IPAddress(255,255,255,0);
Config.dns1 = IPAddress(192,168,1,1);
portal.config(Config);
portal.begin();
Station host name
AutoConnectConfig::hostName assigns the station DHCP hostname which complies with RFC952. It must satisfy the following constraints.
- Up to 24 characters
- Only the alphabet (a-z, A-Z), digits (0-9), minus sign (-)
- No '-' as last character
Ticker for WiFi status
Flicker signal can be output from the ESP8266/ESP32 module according to WiFi connection status. If you connect the LED to the signal output pin, you can know the WiFi connection status during behavior inside AutoConnect::begin through the LED blink.
AutoConnectConfig::ticker option specifies flicker signal output. The following sketch is an example of flashing the active-high LED connected to pin #16 according to WiFi connection during the AutoConnect::begin.
AutoConnect        portal;
AutoConnectConfig  Config;
Config.ticker = true;
config.tickerPort = 16;
Config.tickerOn = HIGH;
portal.config(Config);
portal.begin();
The AutoConnect ticker indicates the WiFi connection status in the following three flicker patterns:
- Short blink: The ESP module stays in APSTA mode.
- Short-on and long-off: No STA connection state. (i.e. WiFi.status != WL_CONNECTED)
- No blink: WiFi connection with access point established and data link enabled. (i.e. WiFi.status = WL_CONNECTED)
The flicker cycle length is defined by some macros in AutoConnectDefs.h header file.
#define AUTOCONNECT_FLICKER_PERIODAP  1000 // [ms]
#define AUTOCONNECT_FLICKER_PERIODDC  (AUTOCONNECT_FLICKER_PERIODAP << 1) // [ms]
#define AUTOCONNECT_FLICKER_WIDTHAP   96  // (8 bit resolution)
#define AUTOCONNECT_FLICKER_WIDTHDC   16  // (8 bit resolution)
AUTOCONNECTT_FLICKER_PERIODAP:
Assigns a flicker period when the ESP module stays in APSTA mode.AUTOCONNECT_FLICKER_PERIODDC:
Assigns a flicker period when WiFi is disconnected.AUTOCONNECT_FLICKER_WIDTHAPandAUTOCONNECT_FLICKER_WIDTHDC:
Specify the duty rate for each period[ms] in 8-bit resolution.
AutoConnectConfig::tickerPort specifies a port that outputs the flicker signal. If you are using an LED-equipped ESP module board, you can assign a LED pin to the tick-port for the WiFi connection monitoring without the external LED. The default pin is arduino valiant's LED_BUILTIN. You can refer to the Arduino IDE's variant information to find out which pin actually on the module assign to LED_BUILTIN.3
AutoConnectConfig::tickerOn specifies the active logic level of the flicker signal. This value indicates the active signal level when driving the ticker. For example, if the LED connected to tickPort lights by LOW, the tickerOn is LOW. The logic level of LED_BUILTIN for popular modules are as follows:
| module | Logic level | LED_BUILTIN Pin | Arduino alias |
|---|---|---|---|
| NodeMCU V1.0 | Active-low | 16 | D0 |
| WEMOS D1 mini | Active-low | 2 | D4 |
| SparkFun ESP8266 Thing | Active-high | 5 | |
| Adafruit Feather HUZZAH ESP8266 | Active-low | 0 | |
| NodeMCU 32s | Active-high | 2 | T2 |
| LOLIN32 Pro | Active-low | 5 | SS |
| SparkFun ESP32 Thing | Active-high | 5 | |
| Adafruit Feather HUZZAH32 | Active-high | 13 | A12 |
Built-in OTA update feature
AutoConnect features a built-in OTA function to update ESP module firmware. You can easily make the Sketch that equips OTA and able to operate with the AutoConnect menu.
AutoConnectConfig::ota specifies to import the built-in OTA update class into the Sketch.
See the Updates with the Web Browser chapter for details.