|
|
5 years ago | |
|---|---|---|
| .. | ||
| data | 6 years ago | |
| README.md | 6 years ago | |
| mqttRSSI.ino | 5 years ago | |
README.md
mqttRSSI
Publish ESP8266/ESP32 WiFi signal strength to MQTT broker
This example is based on the description of the MQTT client application in the AutoConnect documentation. To experience this example, you need to prepare the ThingSpeak account and the channel for MQTT message exchange in advance.
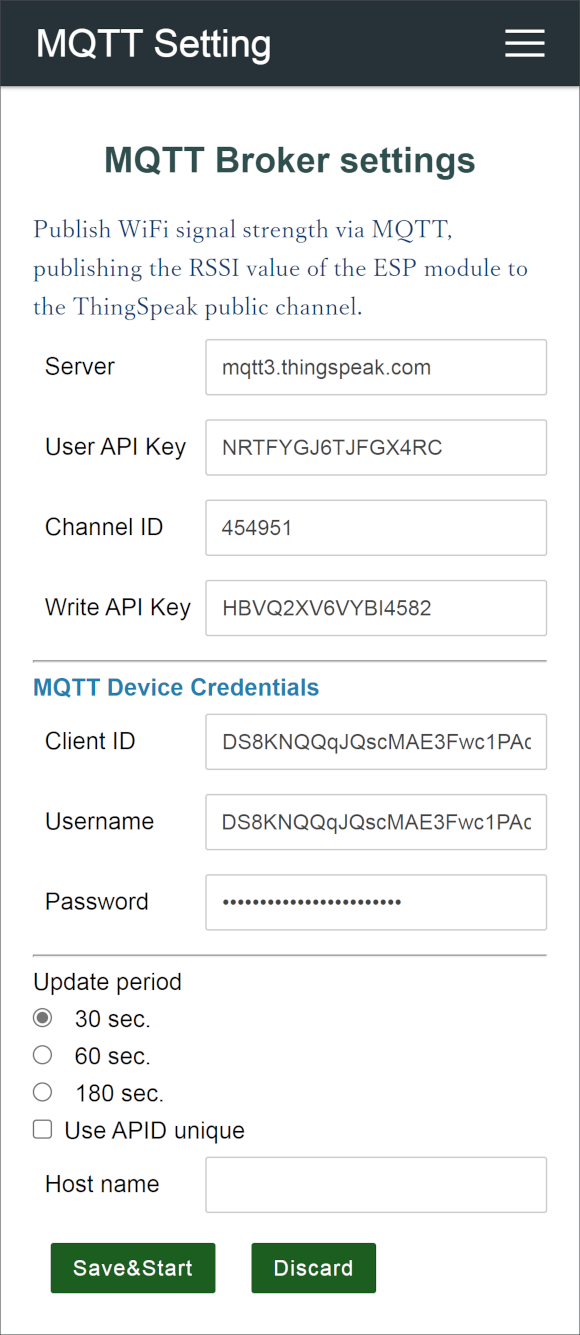
The mqttRSSI equips with a custom Web page for configuring broker parameters. You can invoke the MQTT Setting web interface from the AutoConnect menu to configure for the mqtt broker performed on Thingspeak. This custom Web page is written in JSON and embedded in the sketch. Also, the mqttRSSI_FS example stores the JSON document in the flash of ESP8266/ESP32 module and separates it completely from the sketch. Instructions and the APIs for equipping custom Web pages are available in the documentation. (This example requires ArduinoJson version 5 or version 6 library.)
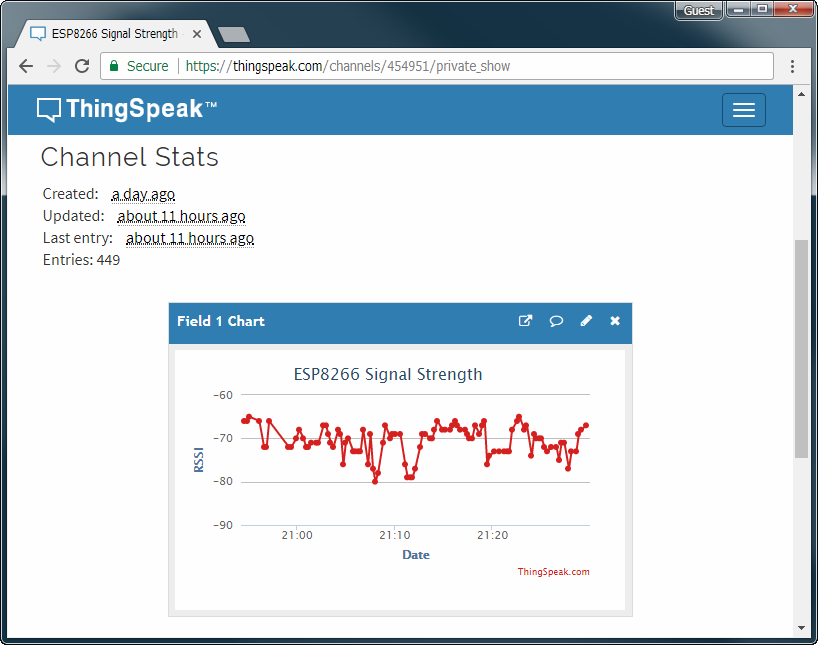
The ThingSpeak is the open IoT platform. It is capable of sending data privately to the cloud and analyzing, visualizing its data. If you do not have an account of ThingSpeak, you need that account to proceed further.
Advance procedures
- Arduino Client for MQTT - It's the PubSubClient, install it to Arduino IDE. If you have the latest version already, this step does not need.
- Create a channel on ThingSpeak.
- Get the Channel API Keys from ThingSpeak, put its keys to the sketch.
You can sign up with the ThingSpeak sign-up page. (You are entrusted with the final judgment of account creation for ThingSpeak. Create an account at your own risk.) And you can learn about other steps from the explanation page of this example.
Obtaining the keys you need
A mqttRSSI requires the following three key data. After completing the above preparation you should be able to get the three key data. Specify those key data to the value in each element of the param.json file in the data folder.
Channel ID
{
  "name": "channelid",
  "type": "ACInput",
  "value": "",
  "label": "Channel ID"
}
User API key
{
  "name": "userkey",
  "type": "ACInput",
  "value": "",
  "label": "User Key"
}
Write API key
{
  "name": "apikey",
  "type": "ACInput",
  "value": "",
  "label": "API Key"
}
Sketch data upload
To param.json file upload to ESP8266/ESP32 flash memory, you need use the plugin tools as sketch data uploader. You can get one (or both) of the plugins below and upload the param.json file to the module.